A chronicle of my life in recipes. I love to cook, but more importantly I love to eat. The food you cook and eat tells a story of where you were raised and the path you have traveled. This is my story . . .

Tuesday, August 9, 2011

Coconut Cookies

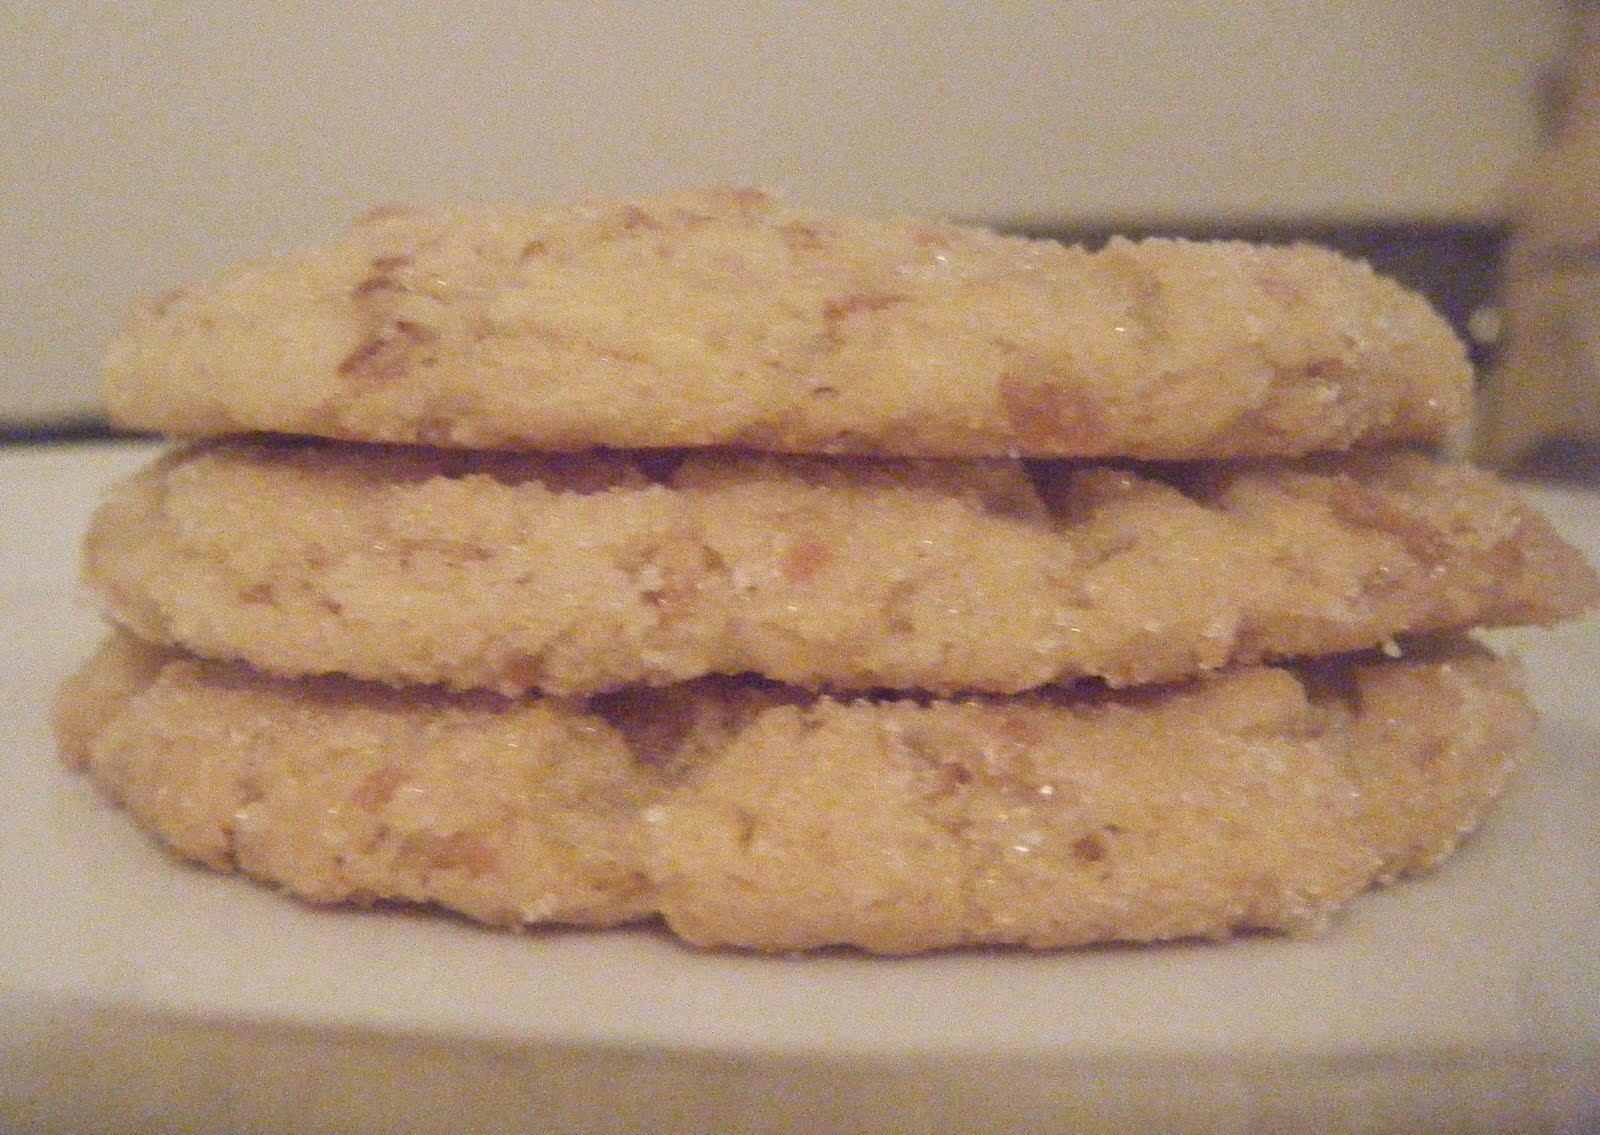
This is an amazingly versatile sugar cookie recipe that has evolved into a number of flavor variations. This flavor is one of my favorites. Nothing smells better than toasting coconut! Sweet and crunchy, it adds the perfect punch to this simple cookie.

INGREDIENTS:
8 oz. Butter, 2 sticks
1 3/4 C Sugar
1/4 C Brown Sugar
2 Large eggs
1 T Coconut syrup
1 tsp. Vanilla
3 C Flour
1 tsp. baking soda
1 1/2 C toasted coconut, chopped or crumbled

Get all your ingredients ready, mix, scoop and freeze. Pull out cookie flavors as you bake and you can always have a variety of flavors to bake and serve. I mix several flavors in one day and store in the freezer to bake fresh another day.
PREPARATION:

Toast slow and mix often to attain the dark caramel color. Heat oven to 350 degrees and place sweetened coconut on a parchment lined pan. Bake approximately 10 minutes, stirring often to prevent over cooking, until golden brown. Remove from pan to cool, as the coconut will continue to cook and brown outside of the oven. Cool coconut and crunch with your hands or chop with a knife prior to mixing into the cookies.
PREPARATION:
Beat together, sugars and butter until yellow and fluffy. Beat in eggs, vanilla and coconut syrup. In a large bowl, mix dry ingredients with coconut. Mix dry ingredients into wet ingredients, just until combined.
Scoop with a 40 scoop onto a parchment lined baking dish. Flatten cookies with two fingers and freeze. To bake right away, flatten and place two inches apart on a baking sheet. Coat with sugar and bake at 350 degrees, approximately 12-15 minutes, rotating pan once during baking. To bake later, place scooped cookies on the sheet, flatten and freeze. Once frozen, bag and date. To bake, preheat oven to 350 degrees, dip the cookies in granulated sugar and place 2 inches apart on the baking sheet and bake as directed above.

Tuesday, August 2, 2011

Nectarine Basil Lemonade

This was one of my favorite recipes when we created the Dallas Dish cookbook, I need to make it more often. I was shocked while Beep, Bo and I were at an Italian dinner, when Bo announced that he loved basil. I never knew! Then it dawned on me, I make Bo nearly every fruit flavored lemonade I can think of, but have never made him this. He was so little when I was working on the book, I would have never imagined that he would like it. And just like all the planets coming into alignment, I happen to have a basil plant the size of barn. Things could not be more perfect. So, here is an oldie, but a goodie from Dallas Dish. Below is the actual photo we shot for the book, I think Brook and Dave do a much better job with the styling and photography, but then I am just in a normal kitchen with natural lighting and my dinky fuji waterproof camera. My pictures are the other ones, it's pretty easy to tell them apart.


INGREDIENTS:
2 C Water
1 C Fresh Basil leaves
1 Nectarine, chopped do not peel
3/4 C Sugar
1 1/2 C Cold Water
1 C Fresh Lemon juice
Additional Nectarine and basil for garnish
I doubled the recipe, simply because I had SO much basil and nectarines are wonderful and plentiful this time of year. Bo, also, will finish it off in no time.

PREPARATION:
Combine 2 Cups water, 1 Cup basil, the chopped nectarine and the sugar in a saucepan and mix well. Place the pan over medium high heat and bring the mixture to a boil, until the sugar dissolves, stirring occasionally. Reduce heat and simmer for about 5 minutes, stirring occasionally. Let stand until cool.
You can juice lemons while the mixture is cooking or you can cheat like I did and buy freshly squeezed. I got a 16 oz. bottle at our local Central Market for about $3, it doesn't pay to buy the lemons and squeeze them at that price and it was perfect for my double batch.
Once cool, strain the mixture through a fine sieve over a pitcher, pressing all the liquid out of the fruit. Discard the remaining solid fruit. Stir in the cold water and lemon juice, serve over ice or chill for later. YIELDS: 6 Cups, I ended up with just over 2 Quarts after pouring Camille a glass.


Camille and Cameron both turned up their noses, looking at the nectarine and basil stew that was brewing on the stove top, but Camille was converted, Cam, well he will take a bit more arm twisting. Don't doubt these flavors, your tongue will thank you!


My, not quite finished product, this is before adding the additional water, so it is a bit darker than the true lemonade. The color is amazing, although my picture, as promised is slightly less professional than the one in the book! HA HA, if I took the time to garnish and worry any more about presentation recipes would never get posted.

Friday, July 22, 2011

Mai Kai


No matter if you go for dinner and a show or happy hour and appetizers in the Tiki Bar Lounge, you visit to this Fort Lauderdale landmark will be a memorable one.
Happy hour at the bar is the best deal, enjoy half price drinks and appetizers, live music on Wednesdays and Fridays and you can still take a stroll and tour the grounds before you leave. Arrive early or call by 4:00 pm that day and reserve at table. Serving up a bounty of food, fun and libations since 1956, they must be doing something right. Labeled mild, medium and strong there is a tropical cocktail for every palate! Some of the best people watching in town, you'll see tourists and locals who never cease to entertain, sometimes more than the paid entertainment.


Beep's roast duck and fried rice. Dinner and the show are a must see, but honestly, the appetizer menu beats the dinners hands down for quality and taste. Don't miss our on the pressed duck!

Aunt, Mike and the kids enjoy our beverages in the bar.

The Pu Pu Platter, best on the planet. Crab rangoons, egg rolls, ribs, cheese tangs and more. You get the perfect taste of everything.

http://maikai.com/

La Bonne Crepe


One of our favorite Fort Lauderdale restaurants! Pictured here, is Bo's favorite . . . the escargot crepe.


Mike and Cam giving the Vana White treatment to Cam's crepe, Bacon and Scrambled Egg.

Beirgarten Restaurant, Epcot

A great find during our visit to Epcot a few years ago was the Beirgarten Buffet. We had always stopped by for a quick brat, beer and pretzel in Germany, but had never even thought to enter the dining hall. Since our first visit, The Beirgarten has become a must on our Disney itinerary. All your home cooked German favorites at an all you can eat buffet, accompanied by a lively band and delightful waitstaff from various areas of Deutschland.

Beep's plate of Sauerbraten and spaetzel, two of his very favorites!


Beep's other plate of schnitzel, red cabbage and saurkraut.

My plate of Saurbraten, dumplings, green beans, brats, cabbages and our very dainty beers. You'll be ready to walk the entire park after this German feast!
http://disneyworld.disney.go.com/dining/biergarten-restaurant/

Grilled Artichokes


One of our favorite dishes from Houston's, the chain based out of Colorado, is their grilled artichoke appetizer. Camille requested them at home, so I decided to give it a shot. What a HIT!
The kids like them paired with the traditional melted butter, but I improvised and made my version of Houston's remoulade.

INGREDIENTS:
Artichokes
Water
1 Lemon
Olive Oil
Salt & Pepper

PREPARATION:
Begin with a large deep skillet with about a half inch of water in the pan. Depending on the number of artichokes you may need more than one pan. The artichokes should fit in a single layer and just sit in the water, you want to steam them, not boil them in the water. Juice half of the lemon into the water. Next, cut the artichokes in half and remove the choke (the furry part by the stem), using the tip of a sharp knife cut just under the furry part and use a spoon to scoop out all the furry pieces, removing any of the small inner prickly leaves too.


Bring the water to a simmer. Place the artichokes in a single layer and top with a lid to steam. Allow to steam until tender, about 15-20 minutes, depending on the size. I just test them with an knife at the thickest part of the vegetable. Remove from the water and drain any water trapped in the leaves. Place the artichokes on a platter and drizzle with olive oil. I like to use a brush to spread it more evenly. Season generously with salt and pepper.


Finally, grill artichokes, cut and seasoned side down on a hot grill. You don't need to grill them long, they are already cooked so just get a little color on them and serve with melted butter or remoulade. (see recipe below).
REMOULADE INGREDIENTS:
1/2 C Mayonaise
1 tsp. Mustard, preferably a grainy dijon style
1 tsp. tomato paste or ketchup
cayanne pepper, to taste
Salt & Pepper
A pinch of sugar
I don't measure this very accurately, this is one I just eyeball and taste to get it right. If you aren't comfortable with the "eyeballing" technique, there are very good recipes if you google remoulade.


PREPARATION:
Mix all ingredients together and chill. Taste for seasoning, I like mine with a little kick, but be careful the cayenne will strengthen as the remoulade rests, so it is best to check just prior to serving and make any adjustments. Serve with the yummiest vegetables you will ever put in your mouth!


Tuesday, June 7, 2011

Herb Saint

Let's start with dessert, because often that is the best part of the meal. Beep and I had one of the most memorable meals ever at Herb Saint in New Orleans! Every part of this meal was amazing. Check out their web page, the pictures, not surprisingly show off the food slightly better than mine. It will make your mouth water. They have a delightfully, fair priced offering of small plates as well as larger main dishes to sample and share.


I don't remember the fancy name they gave this, and unfortunately it is no longer on the seasonal menu, but it was basically the lightest, yummiest version of a panna cotta. Pray for the quick return of this decadent treat.


Banana Brown Butter Tart with Fleur de Sel Caramel


Fried Brussel Sprouts, perfectly seasoned and crispy, like a potato chip, you can't stop at just one, it was the vegetable of the day, so you might not be as lucky as we were. Worth a repeat visit if they are not offered.


Duck Leg Confit with Dirty Rice and Citrus Gastrique.


Louisana Shrimp and Grits with Tasso ham and okra.


Pork Belly with sticky rice cake, greens and cucumber salad.


Two small plates: Pasta Carbonara topped with a panko crusted poached duck egg and Crab salad with beets and grapefruit.

Gumbo of the day.

Thursday, June 2, 2011

Blueberry Crumble Tart


Blueberries are one of Beep's favorites and instead of making muffins or a blueberry sauce, I decided to try something different. It was our 21st anniversary and I had bought berries a week ago and they needed desperately to be used. I found a great recipe for blueberry bars on the web but didn't have enough berries for the recipe and decided to wing it! A couple of ingredient substitutions and a variation in the baking dish, and Dr. Frankenstein has a new creature. This is the result, not a tart, not a pie, but the perfect combination of filling and crust from a bar recipe. Served warm with vanilla ice cream it is the perfect combination of tart berries and buttery crust! You will love it, I promise.

Preheat oven to 375 degrees and grease a 3 inch deep tart pan with Pam.

INGREDIENTS:
1/2 C Sugar plus an additional 1/4 C
1/2 tsp. Baking Powder
1 1/2 C Flour
1/4 tsp. Cinnamon, over flowing
4 oz. Butter chilled and cubed
1/2 Egg beaten, 3/4 oz if you have a scale
1/4 tsp. Almond extract
2 C Blueberries, fresh
2 tsp. Corn Starch
1/2 tsp. Lemon juice


PREPARATION:

First mix the ingredients for the crust. In a medium bowl, stir together, 1/2 cup sugar, flour, baking powder and cinnamon. Add cubed butter and egg, mix in with forks or pastry cutter. I also like to use my fingers until well combined. You should have 2 1/2 cups of dough. Press approximately 1 1/2 cups of the dough into the bottom of the tart pan an partially up the sides. In a separate bowl, combine the 1/4 C sugar, extract, cornstarch, lemon juice and berries and sprinkle evenly over the tart shell. Top with remaining crumble and bake in a 375 degree oven for approximately 45 minutes. I placed the tart pan on a baking sheet and baked on the lower rack of my oven for 30 minutes rotating half way through, then moved to the top rack for the remaining 10-15 minutes until the crumble was golden brown. (I couldn't help taking a peek every now and then, it is done once the berries are bubbling and the crust is golden brown.) Allow to cool, loosen edges with a knife or an off-set spatula and remove from tart pan. Cut a slice, warm in the microwave and serve warm with vanilla ice cream. YUM!!! It is like the perfect slice of blueberry pie, not too much filling and the perfect amount of buttery crust.

Sangria


Summer time means Sangria and lazy days lounging by the pool! It doesn't get any better than this, just mix, chill and enjoy.

INGREDIENTS:
1 750ml bottle of red wine, good table wine will do
8 oz. Orange juice
1/4 C Grand Marnier
1/8 C Chambord
2 T. Sugar
1 Handful fresh Cherries, halved and pitted
1 Handful Grapes, seedless and halved
1 Apple cored and sliced into wedges
2-3 Oranges or Clementines sliced, I prefer Clementines, cute, no seeds.
Large pinch of Cinnamon
Chilled Sparkling Water

PREPARATION:
Mix wine, liquors, sugar, cinnamon and fruit: Chill at least 6 hours. When ready to serve, pour Sangria into glasses with one third sparkling water. Garnish with fruit and serve.

Saturday, April 23, 2011

Camille's Favorite Queso AKA Creamy Tacos

Growing up in Indiana, we didn't know about queso. A friend of my mom's used to make this and we called it "Creamy Tacos". When the moms wanted to get together and keep us kids happy, we would have creamy taco night. Back then, you would place a layer of tortilla chips on a plate, top with creamy taco mixture and then garnish with your favorite taco toppings: shredded lettuce, tomato, sour cream, salsa, etc. For my family, it has evolved into a dip. Both methods are equally yummy!
Local to Dallas, I have learned another twist on queso: Bob Armstrong dip. Named for a big D local, a few of the tex-mex restaurants around town offer queso this way. Queso with ground beef, tomato, a scoop of guacamole and a scoop of sour cream!

INGREDIENTS:
1 Pound Ground Beef
1 15 oz. Can Hormel Chili with no beans
1 14.5 oz. Can Stewed Tomatoes, I use Mexican blend
1 Pound Velveta Cheese
Heavy Whipping Cream


PREPARATION:

In a 6 QT. stock pot, brown ground beef on medium high heat, breaking up meat into small pieces with a wooden spoon. Drain any fat, I usually don't have any because I use 90/10% beef. Reduce heat to medium low. Stir in the can of chili until meat is coated. Add tomatoes to the pot and break those up into smaller pieces too, using the spoon. Cube the cheese and add it to the pot, stirring constantly until the cheese is completely melted. Once the cheese is melted, add the cream and serve or cool, refrigerate and store to serve later. I often make a big batch and freeze in smaller batches to re-heat at will.